Help Center -> Loggers -> Pro Logger -> Charging Your Pro Logger
The Pro Logger can only be recharged using the designated charger, sold separately.
Please contact your EXACT representative or support@exacttechnology.com for more information on how to order one
Charging Your Pro Logger
01
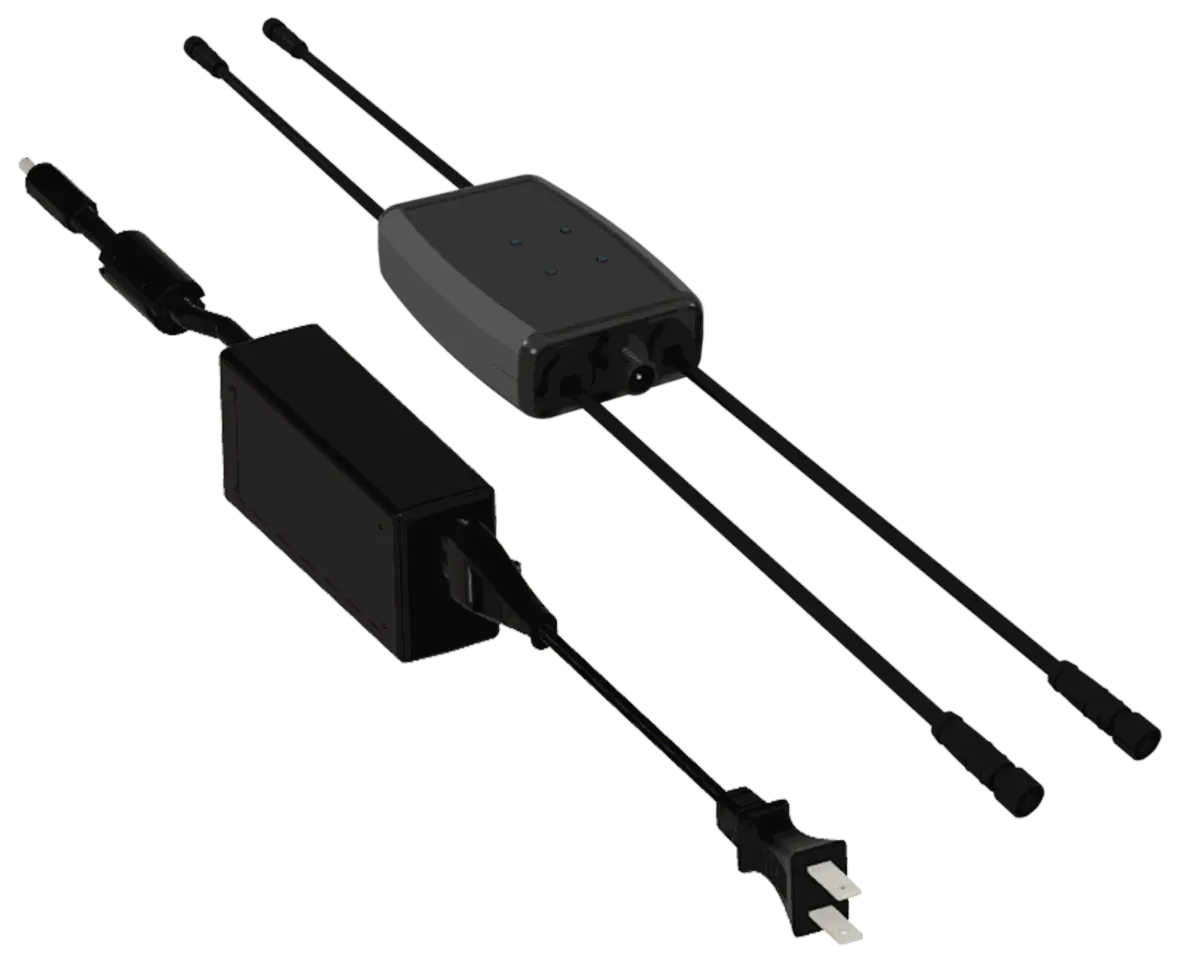
Plug the Charger to the included Power Supply

It is very important that you use the included power supply. Other power supplies might not handle the power requirements of 4 Loggers.
02
Access the Logger’s Charging Port
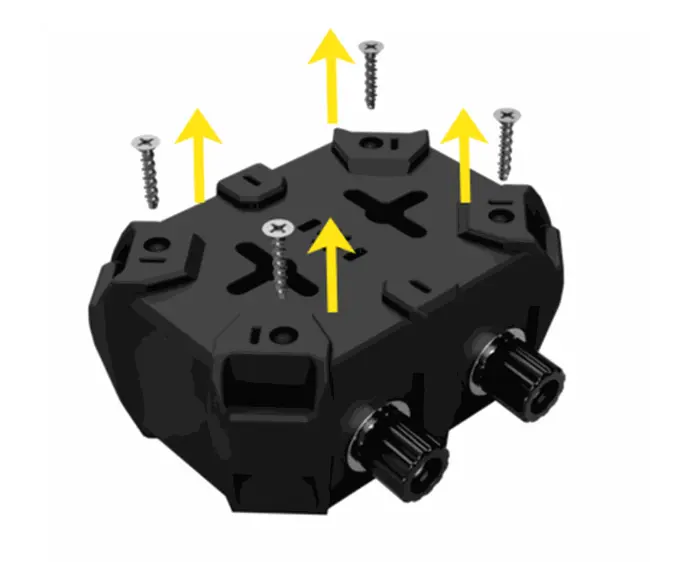
If there is potting material covering the screws, you can remove it using a flathead screwdriver.
03
Locate the Charging Port
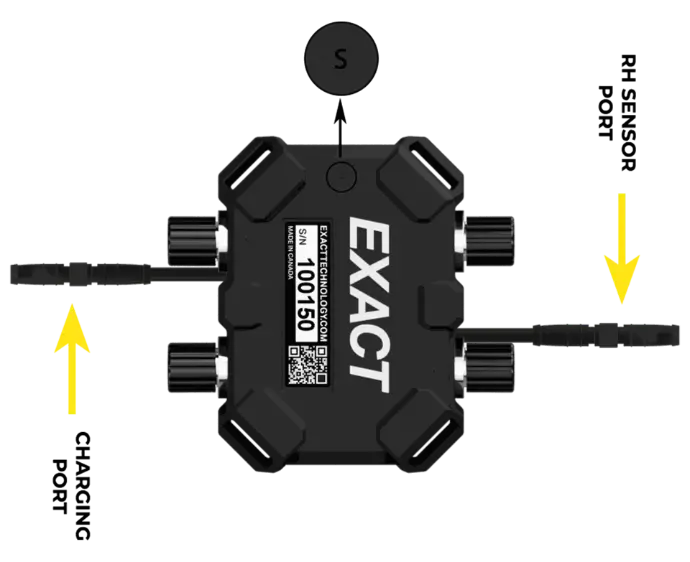
On some units, the RH sensor port will have an orange cap/cable or is labeled with a white mark.
04
Disconnect the Connector Cap
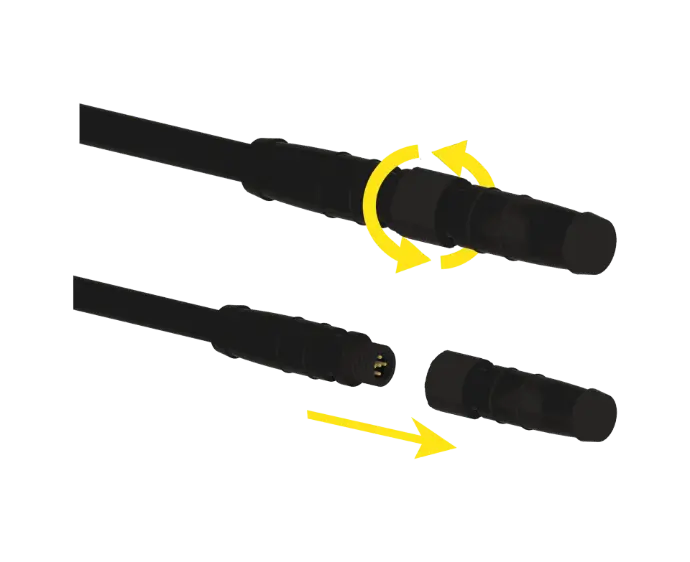
Make sure you save the cap in a safe place while the Logger charges.
05
Connect it to one of the Charger Cables
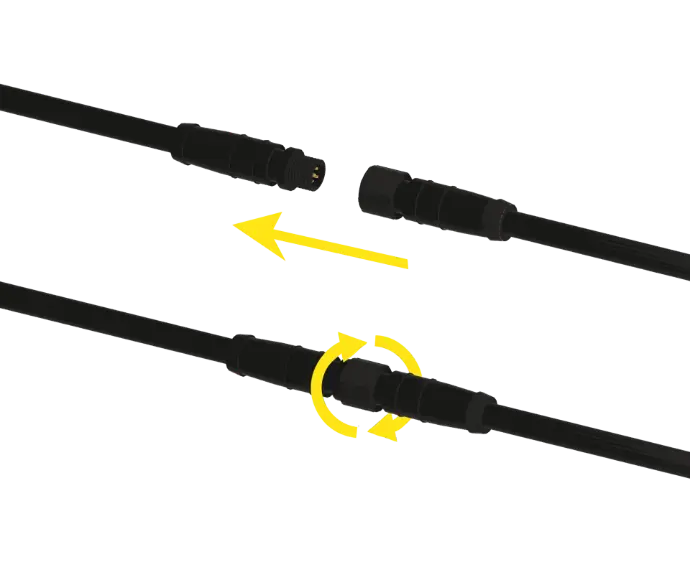
Tighten the lock ring to ensure the port does not inadvertently disconnect while the Logger is charging.
06
Let it Charge!

Allow the Logger to charge for up-to 8 hours. The red LED indicator on the charger will turn blue when charging is complete
07
Re-assemble the Logger
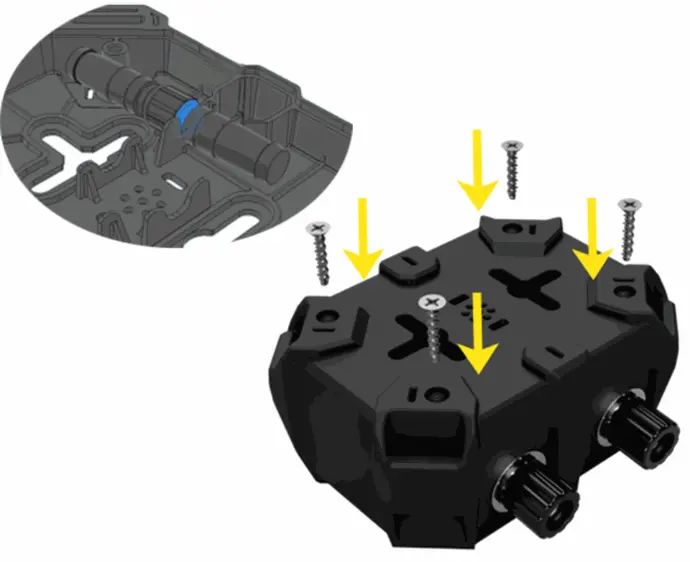
- Disconnect it from the charger and place the cap back on the connector.
- Ensure you tighten the cap using the lock ring to preserve the Loggers water resistivity.
- Position the capped charging connector in its designated position on the back cover.
- Reinstall the back cover and screw it back in place using the 4 Philips #2 screws.
⚠️
The connectors are keyed, so it will only connect properly if the notches are aligned.